My continued work in Cray-related computational necromancy has led me on a lot of weird adventures over the last decade or so, and I wanted to take the opportunity to document a more recent data recovery effort. As a general rule, when someone contacts me with an ancient Pile-of-Software in some obscure format I gladly accept. I’ve gotten software in just about every format from 5 platter disk-packs to microfiche, and particularly for anything even vaguely digital, I’ve gotten pretty confident that I can recover the data into a usable form. A while ago, a friendly internet stranger contacted me via e-mail to say “Hey, I’ve got a shoebox full of Cray backup tapes from the early 90s. Any interest?”
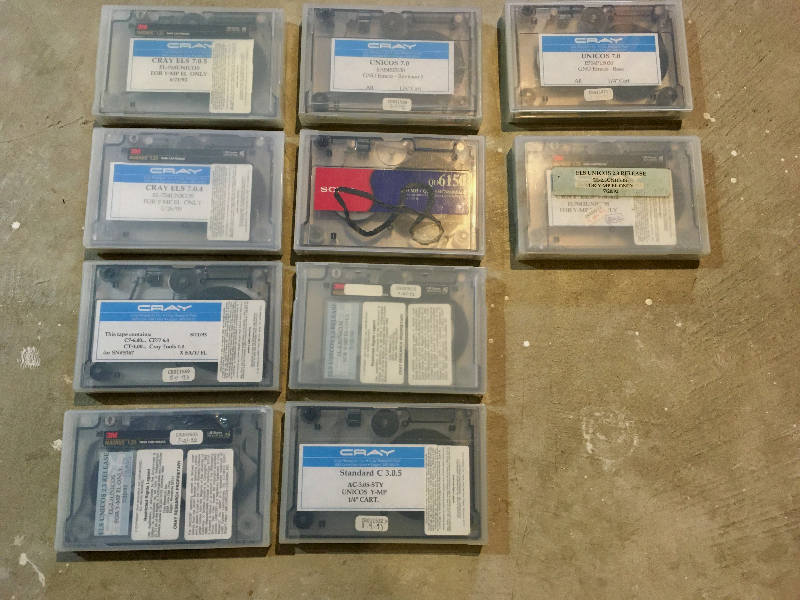
My QIC tape haul!
Already-digitized copies of actual operating systems and utilties? Count me in! After a little back-and-forth, I was the proud new owner of nearly a dozen QIC tapes ranging in size from 150MB to 1.35GB – two complete backup sets (both UNICOS 6.x and 7.x) belonging to a Cray YMP-EL. Andras and I have basically been on a mission to cobble together the oldest, most-functional combo of hardware and software possible, and this was significantly older than our best set at the time (a late 1990s copy of UNICOS 9.x for the Cray J90).
Getting Started
Despite my apparent proficiency in ancient digital hardware, I had never actually worked with tapes before. My age and finances never aligned in a way that tape drives made sense for personal use, so I had to do a bit of studying to figure out how to tackle this. Most of the tapes were in a format called QIC-1350, which could be read by a handful of SCSI tape drives from the early 1990s. After a bit of digging around, I acquired an Anaconda XXXX SCSI tape drive from Ebay for about $75. Andras chipped in with a PCI SCSI card he had lying around, and my friend Jeff at work volunteered to help me muck around with actually extracting the data.
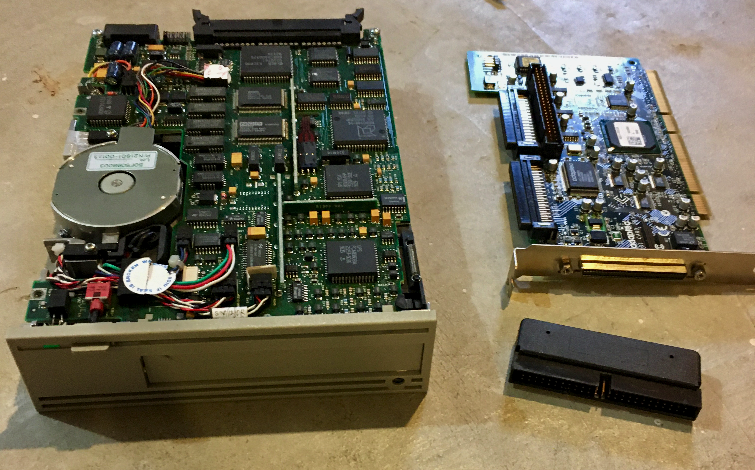
My SCSI toolkit ready to go!
My first bump in the road was SCSI-related – much like tape drives, my age and finances never aligned to actually own any SCSI hardware. SCSI is sort of an odd beast – it was designed for both inside-the-case and external use, and it was a multidrop bus that requires an active electrical ‘terminator’ on the end of the chain to cancel out electrical reflections. A quick trip back to the internet and $25 later, and I owned the cable I needed to connect the tape drive to the PCI card, along with a terminator for the end of the cable.
Jeff and I repurposed an old workstation we found that still had a PCI slot in it, plugged in the PCI card and cabled up the tape drive. We powered things up and . . . success! The workstation recognized the SCSI card just fine (and even tried to boot from it!), Linux detected the SCSI controller and the tape drive, and all seemed well with the world. Maybe this would finally be the easy digital archaeology project I always dreamed of?
When the Rubber Hits the . . . Capstan
At this point it’s useful to pause for a moment and explain something about how this particular computer tape drive functions. Each tape cartridge consists of ~750 feet of tape wound around two plastic spools. A ‘tension band’ (more on this later) then winds around the bottom of both spools and a plastic wheel called a ‘capstan’ that protrudes from the tape cartridge. The tension band is stretched such that if the capstan wheel is rotated in either direction, both spools are rotated a uniform amount and the tape is transferred from one spool to the other (first passing in front of a little hinged door on the tape so that it can be read). The tape drive itself is a complicated little robot that sucks in a tape, hinges open the little door so that the read head can access the tape, and engages a little motor with a rubber-coated wheel called the ‘capstan roller’ to either advance or rewind the tape.
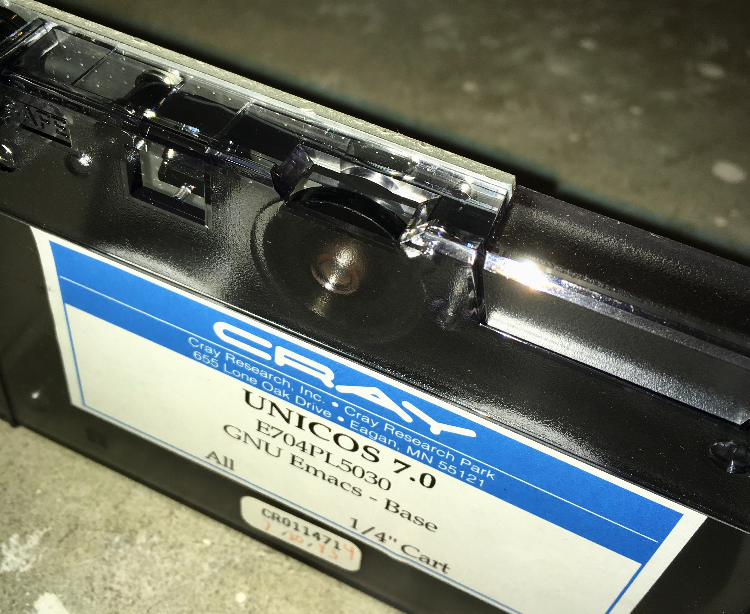
Close-up of the hard plastic capstan wheel in the tape cartridge
When I inserted the first tape, the drive happily performed it’s little tape-loading dance, but when I tried to actually read the data, it just hung. I tried a few more times, tried rebooting, tried a different tape, all to no avail. When changing out the tape, however, I noticed some sticky black residue on the cartridge capstan wheel. It turns out that the rubber wheel on the drive’s capstan roller had turned into a sticky, gooey mess at some point in the 25 years since its manufacture, and when the tape drive attempted to engage it, the rubber just smeared itself on the tape capstan as the motor spun fruitlessly.
After doing some research, it’s an unfortunately common problem for old tape equipment, and one that frequently doesn’t have any straightforward solutions. Occasionally a piece of equipment will be popular enough to warrant someone producing some new rubber wheels for it, although that definitely wasn’t the case for this drive. There are a variety of other hacky solutions floating around the internet from helpful strangers on forums – I tried using small rubber O-rings as a replacement for the original rubber goo, but to no avail.
As I contemplated trying to turn a replacement on the mini-lathe at NYCResistor (apparently trying to freeze the rubber before working it is a common strategy), Jeff had taken the setup home to screw around with it. On a whim, he noticed that some rubber washing machine hose he had in his basement was about the same diameter as the original rubber roller. He cut off a slice, slipped it onto the motor shaft and voila! He actually managed to read a tape! He also managed to snap another tape that had somehow gotten knotted. When it was working, the drive seemed to frequently need to stop, rewind and start over (presumably due to a detected error). Still, this was progress!
A Better Solution
At this point we could basically see a path to a better solution – we needed a reliable rubber wheel for the capstan roller, but the drive itself was pretty tolerant. After discussing this some more with some other NYCR members, I decided to try 3D-printing with a rubber-like filament called NinjaFlex. I tried to carefully measure the original capstan roller with calipers, and drew up a replica in a 3D CAD program. After a few false starts as I got the right printing parameters dialed in, I had a decent looking replica that was ready for action. It wasn’t particularly round (compared to something turned on a lathe, for instance), but it turned out to be mostly usable, and allowed recovery of another tape.
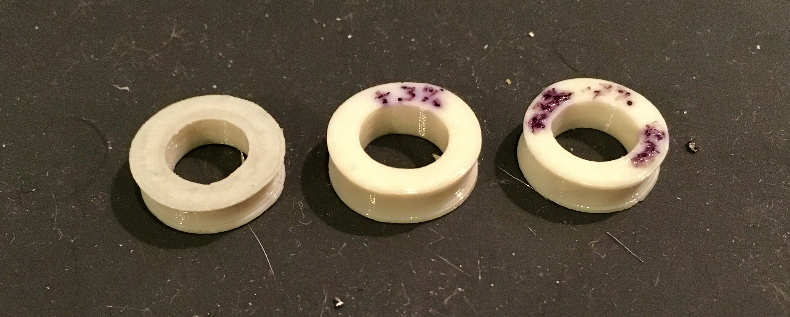
Re-inventing the wheel
The rubber wheel has a lip on the top and bottom that is designed to capture the plastic capstan wheel in the cartridge and prevent it from slipping – a function that wasn’t immediately obvious to me when I was designing the initial replacement. After increasing the distance between the lips by a millimeter or so, the replacement really did work perfectly, and allowed for smooth, quiet operation with almost no retries on a number of subsequent tapes.
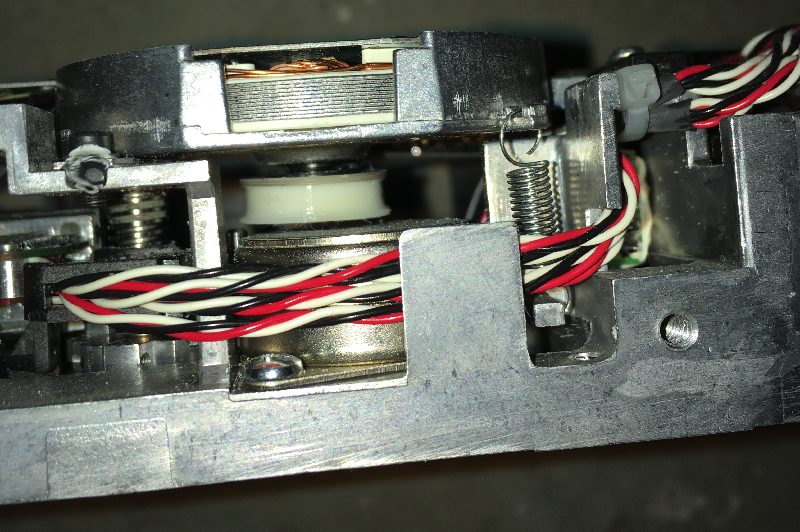
The final capstan roller replacement in it’s natural environment
Tension Headaches, Splicing and other Adventures
At this point, we had successfully managed to read about 2/3 of the tapes. Of the remainder, 2 had suffered from potentially fatal knots that had caused the tape to snap, one tape had a chipped capstan wheel that shredded 2 or 3 3D-printed rollers before I diagnosed it, and another 1 or 2 had sufficiently loose tension bands that the capstan just spun freely without moving the tape. It turns out the two snapped tapes were also casualties of loose tension bands. Much like the capstan roller, a replacement tension band for a 25 year old niche computer tape isn’t something you can just hop on Amazon and buy. After snooping around some websites and forums for retro computing enthusiasts, I came across an interesting solution – apparently submerging a tension band in boiling hot water will cause the plastic to shrink. If you can successfully re-install it without snapping it (not trivial, it turns out), it can restore function for a while. Given that I only needed to read the tapes once, this sounded like the way to go.
As I was reluctant to accidentally destroy any unread tapes, for my first attempt at re-tensioning we tried one of the tapes that had been knotted. It turns out that tape-splicing tape (of the sticky variety) is a product you *can* readily by on the Internet, so Jeff and I gave some open-heart tape surgery a shot. An inch or two of tape needed to be cut out, but we were able to fairly cleanly splice things back together, and the boiling water trick really did seem to work as advertised (leading to a much shrunken, extremely tight tension band). Using a mostly-duct-tape ‘jig’, a couple of chop sticks and like five hands, I actually managed to re-spool the spliced tape and re-apply the shrunken tension band.
The first couple of megabytes of the tape were read in just fine, but when the drive got to the splice it entered into an indefinite loop of stopping, rewinding, and starting over for a little bit (I let it go for a few hours, and it never seemed to recover). SCSI tape drives actually expose a fairly high-level interface in which you read files composed of data blocks that have sequence numbers embedded in them. You tell the drive to give you the next few blocks, and it dutifully goes and retrieves them. There is apparently no way to say “formatting be damned, just give me the bytes,” which I find extremely upsetting as a hardware engineer. Due to the removal of the knot and the subsequent tape splicing, data blocks were missing and there was no way to get past it. Both tapes that required splicing actually wound up being unrecoverable due to this unfortunate design choice, despite the fact that probably only a hundred kilobytes of both 1.35GB tapes were damaged. And people used these things for serious data backup??! Fortunately, in both cases the tapes wound up being minor revisions other tapes which *were* successfully recovered, so nothing significant was lost.
The un-chipped capstan wheel from one of the spliced tapes was successfully transplanted into the chipped cartridge, and another two or three tapes were successfully re-tensioned and recovered. I actually managed to get pretty good at both re-applying tension bands and manually twirling spools to remove slack and repair misspoolings. All in all I probably twirled at least a mile of 1/4″ tape, using a wooden chopstick (whatever you do, don’t use a magnetic screw driver!) to spin the spools and save my fingers.
Final Results
Despite some setbacks, I really did manage to recover two full sets of OS backup tapes, pushing our earliest recovered operating environment back a full 6 or 7 years. At that point, my contribution was mostly done, and my friend Andras proceeded to do a crazy amount of work to actually get things up and running. Check out his write-up to see the gory details!