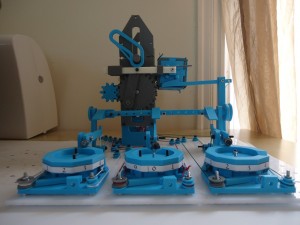
Have you ever been sitting there, quietly computing something and thinking to yourself, “If only this process were somehow billions of times slower, less reliable, and involved lots of physical labor”? If so, the Turbo Entabulator is the machine you’ve been looking for! While I get to spend my days working on one of the world’s fastest computers, I like to relax when I get home . . . slow things down a little. You could say I like to enjoy both ends of the computing spectrum. After my success with the FIBIAC project, an electromechanical beast chugging along at nearly one micro-operation-per-second, I opted to go even slower with this one. I also wanted to try my hand at something a little more mechanical. The result is a nearly-entirely 3D-printed, entirely-mechanical computer (for the purists out there, yes, I used lots of nuts & bolts, a handful of springs, rubber bands, and a dozen or so tiny bearings). I even printed out the punch-cards!
This machine is effectively an entirely-mechanical implementation of my FIBIAC machine. It uses the same principle for computing – a set of registers can be selectively incremented/decremented until a selected register reaches zero. I even kept the business-card sized punch cards. The best part? Zero electronics. Run the machine under water if you want, it won’t care. It’s all ratchets, gears, and pulleys. The machine is entirely driven by a central crank-shaft with a handle attached to it – want to overclock this monster? Crank faster! There is something about entirely mechanical systems I find appealing – the inner workings aren’t hidden in a nanometer-sized sliver of silicon, operating on pico-second timelines.
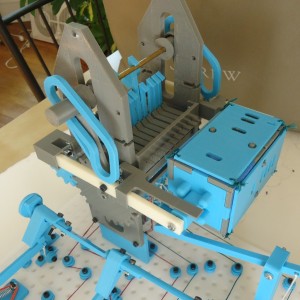
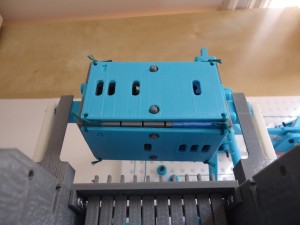
The Punch-Card Reader
After my FIBIAC project whet my appetite for mechanical engineering, a picked up an 1895-copy of The Mechanism of Weaving. For anyone interested in mechanical control systems (or anyone with steampunk leanings who anticipates being sent back in time), this is the book for you. It covers a wide variety of mechanisms for surprisingly high-speed, complex control systems (1000 hooks per punch card, 200 cards-per-minute, multiple card readers!). The book made it crystal-clear why people were maimed all the time in industrial accidents in the 1800s. It also made me think Charles Babbage must have been a huge jerk to not be able to get his machine working, since power-loom engineers were definitely building things nearly as complicated just for making rugs quickly, but I digress.
This project actually started out with the intent of building a tiny loom, and a built a simple 3-hook card reader as a proof-of-concept. Trying to build out the rest of the loom turned out to be way more complicated than I anticipated (my tiny flying-shuttle kept getting caught and causing tiny industrial accidents).
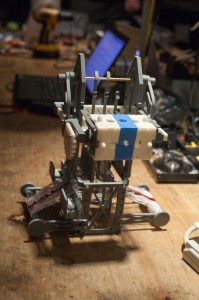
I eventually gave up on the loom idea and decided I would have to settle for a mechanical computer instead. I was able to improve my original card reader a great deal:
- I expanded it from 3 hooks to 10 (enough control signals to drive 3 counters)
- I made properly spring-loaded needles to deflect the hooks
- I vastly improved the hook design to allow tensioning the strings connected to them, and make them much sturdier.
- I added a crank with a handle to the main drive-shaft, which vastly improves the ‘user-interface’ of my computer (and makes my fingers less sore). Take that Jony Ive!
The result is a reasonably reliable, 3D-printable 10-hook punch card reader.
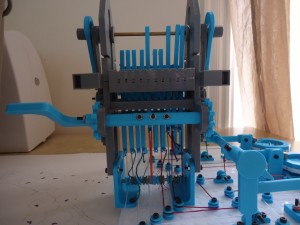 Files are available here
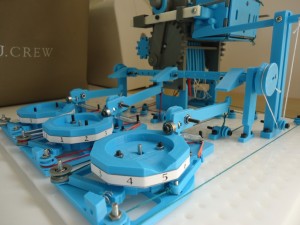
The Counter
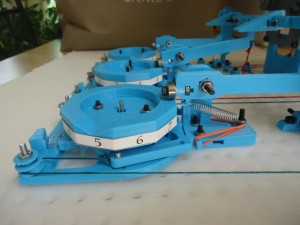 I basically designed this by trial-and-error. I went through about 20 different iterations that didn’t work, and finally found one that sort-of-worked. I then tweaked all the different components until I got something that sort-of-works, most-of-the-time. Mechanical engineering is *hard*, it turns out. When things go wrong, they have a tendency to jam / snap / bend / wobble and grind. This is a simple counter with a bi-directional ratcheting mechanism. The hooks pull one of the pawls down to turn the ratchet gear one direction or the other, and the rubber-band returns the pawls to their resting position when done. A spring-loaded detent mechanism forces the ratchet-gear into one of 10 discrete positions, so it can be used as a base-10 counter.
Get the files here
How does it work?
This machine has 3, single-digit base-10 registers, and a 10-hook Jacquard-style punch card reader. Two hooks assigned to each counter can be used to either increment or decrement the register (if you accidentally select both at the same time, the machine will jam up until something snaps!). A spring-loaded lever attached to each counter gets raised whenever that counter is reading ‘zero.’ An extra hook is used for each counter to selectively pull down this lever, so that it gets ignored. A ‘zero-detect’ shaft runs the length of the machine, and gets rotated 30 degrees or so whenever a zero-detect lever gets triggered. This in-turn rotates a pulley attached to the end of the shaft, which pulls on a string, which lifts a ‘catch’ mechanism to rotate the ‘cylinder’ of the punch card reader and advance to the next instruction! Tadaa! A computer!
Each instruction card selects a set of hooks to be raised, incrementing or decrementing some subset of the counters. The instruction card just gets read over and over until a register (that hasn’t had its zero-detect mechanism ‘disabled’ by another hook) reads ‘zero.’ Like the FIBIAC, it executes a four-instruction program that computes the fibonacci sequence, and is physically laced together to form a continuous loop.
The program:
- Enable R1, R3. Decrement R1, Increment R3. Stop when R1==0.
- Enable R1, R2, R3. Increment R1, Decrement R2, Increment R3. Stop when R2==0.
- Take a minute to write down the next number in the sequence, and savor the fact that you’re using a freaking mechanical computer. An extra hook is provided to ring a bell of some sort, although it is currently unimplemented for lack of bells.
- Enable R2,R3. Increment R2, Decrement R3. Stop when R3==0.
Having made the cards on the same printer I made the machine on, I was able to add some nice touches, like embossed instruction numbers. The cards are laced together with some embroidery floss I had lying around (‘compiling’ requires nimble fingers and lots of patience!).
Watch it run!
This took a couple tries to get it to run to completion without having something jam or having a counter skip. Fortunately my wife, librarian extraordinaire and woman of infinite patience, was there to assist =) The machine starts out with the two counters on the left set to ‘1’, and the right-most counter set to ‘0’. Executing the program listed above, the next number in the fibonacci sequence is placed into the right-most register when the 3rd card gets executed. It goes through the sequence computing 2, 3, 5 and then 8 (the max before it would overflow, and start computing the fibonacci sequence mod 10).
And get the files to build your own up on thingiverse!
