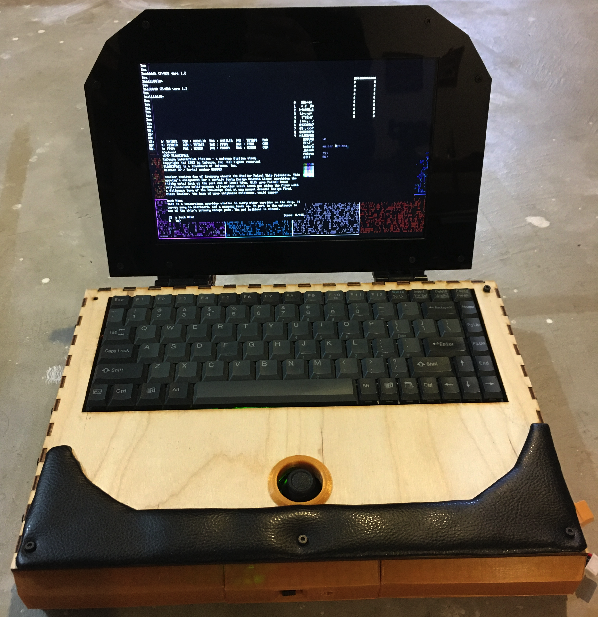
I initially finished this project at the beginning of December 2019, and unlike most of my projects which immediately go on a shelf, never to blink again, this one immediately became my go-to ‘commuter hobby.’ My job, at the time, had entailed a ~45 minute train ride to and from the office each day, which was the perfect time to relax and write some Turbo Pascal.
As soon as I started using it, I immediately wanted to make it better, so as soon as it was ‘finished’, I embarked on a steady 3 months of gradual upgrades (before that whole pandemic thing happened and my commute disappeared). It’s mostly been sitting on a shelf since then, awaiting the end of the pandemic and the return of my daily commute.
Upgrade 1: More Ripping!
For the sake of expediency, I had initially run the whole system on a common clock frequency of 83 MHz (dictated by the video generation logic). I decoupled the video generation from the rest of the system, and was able to increase the system clock (which drives the 16 Z80 cores and the unidirectional ring network that connects them all) to 140 MHz – a solid 68% speedup (and it’s genuinely noticeable on some Turbo Pascal tasks). That’s basically where I run into the timing ceiling on the Z80 core I’m using. I also sped up the SD card access a little bit, but that’s still one of the more obnoxiously slow parts of the system, and ripe for upgrading in the future.
I did experiment with some nominally ‘faster’ Z80 cores like the NextZ80, but I both had issues with getting them to run reliably (since almost all of them use slightly different logical interfaces), and they all had lower achievable clock rates. This is probably worth revisiting at some point in the future, but for now my 140MHz Z80 cores are quite peppy by 8-bit standards.
Upgrade 2: Mouse support
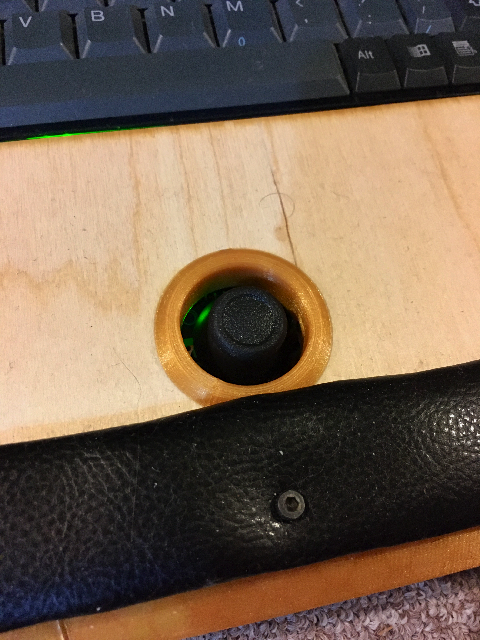
Okay, it’s more of a joystick than a mouse, but still! I installed a 5-switch joystick thingy that connects to the keyboard controller. At the moment, the CP/NET server reads it and allows me to re-arrange terminal windows on the fly. I also added a nice blinky-border effect to indicate which terminal is ‘active.’
My longer term goal is to eventually make a full-fledged ‘GUI’, but this is genuinely a nice feature for multi-tasking thus far (and much nicer to work with than the keyboard-controlled ’tiled’ interface in my original iteration.
Upgrade 3: Power monitoring
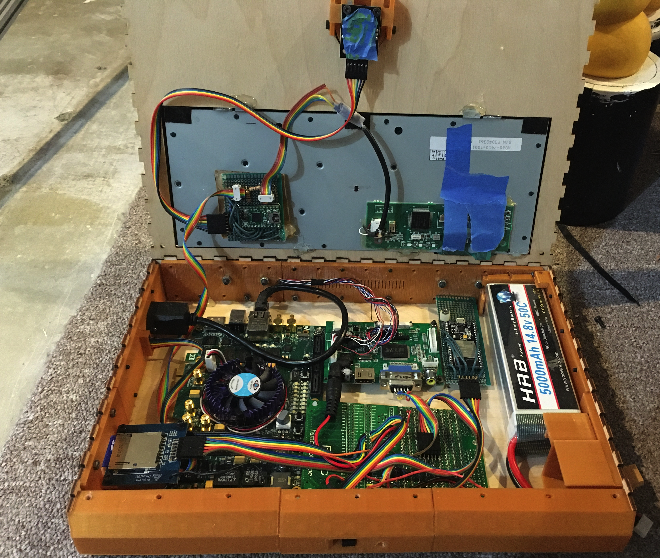
One of those ‘practical’ issues that popped up on my daily commute was knowing what the state of the battery was – there is no built-in battery protection circuitry, the battery terminals just connect to the voltage regulator on the FPGA board through a mechanical switch. It would be really nice to have something like the ubiquitous battery icon modern devices have showing you what percentage of your battery life is left. A 5V micro controller was already present to convert the keyboard and joystick signals into serial commands to the FPGA – I was able to add a voltage divider that the micro controller can sample with an ADC (and use some of the unused serial commands) to provide some low-resolution battery monitoring. Once I get a proper battery monitor somewhere on the screen, I’ll never need to fear another impromptu shutdown in the middle of an intense Zork session!
Upgrade 4: Network Connectivity
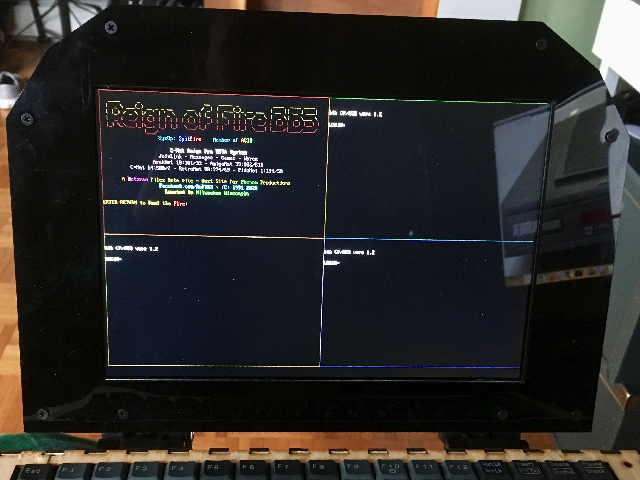
This is one of the bigger features I added – and I managed to get it all working about a week before my commute abruptly came to an end, so I only got to actually use it once or twice ‘in the field’, but it does work pretty well!
I added an ESP32 board loaded with a ‘wifi modem’ firmware, which emulates a Hayes-compatible modem. This is then wired into a UART connected to the server Z80 – voila! I was able to tether to my cell phone and connect to a BBS on the train! The hardware terminals my Z80 cores use are ANSI-compatible, so my ‘terminal client’ was a handful of lines of Turbo Pascal, to basically route things from the modem to the terminal and from the keyboard to the modem – and now I can connect to ANSI-compatible bulletin boards via telnet! It really does work fine, and is pretty fun.
With some more effort, this can also be used to do things like easy file transfers with modern computers via Kermit (my preferred solution when working with my Kaypro, which has a similar modem connected to it).
Upgrade 5: External UART
I wanted an easy way to talk to it without cracking open the case, so I wired a simple FTDI-compatible UART port to the side of the case.
Upgrade 5: Better Windowing Support
Originally, the ‘windowing’ feature was pretty limited – you could display 4 tiled terminal windows at a time, and keyboard hot keys let you select which terminal each tile was showing. As mentioned when discussing the mouse upgrade, I can now freely move terminal windows around the screen with the built-in joystick.
I also added an equally useful upgrade that required a bit more surgery – two window sizes! All of the terminals are a fixed 80×25 characters, but it initially only supported a fixed 8×16 font. I was able to hack in a ‘big’ and ‘small’ mode by dynamically switching between a half-sized 4×8 font and the original 8×16 font, scaling the window to 1/4 its original size! This not only lets you display all 16 cores on the screen at once, but lets you mix-and-match things so that interactive applications can be full-sized, while background or multi-core applications can be quarter-sized.
Upgrade 6: Better Multicore support
In its initial incarnation, the ZedRipper was more like having a 1980s computer lab on your lap than what we think of as a ‘multicore’ computer. How to actually use this beast? I logically subdivided my 16 CPUs into 8 ‘application’ processors, to be used for running individual programs simultaneously, and an 8-core ‘horde’ to be used for multiprocessing experiments. This provides a stable target for multicore applications, while leaving ample CPU available for any actual applications I need to run.
How to actually use those cores though? Remember – my system is architected as a CP/NET server that is monitoring the keyboard and forwarding it to the appropriate CPU core, which is running CP/NOS. Initially my thought was that you might launch the applications individually, but that turns out to be terrible. Now, when you select cores 1-7, the individual ‘application’ processors are targeted as normal, but selecting core 8 conveniently broadcasts keystrokes to cores 8-15 – so you can now launch your application on all 8 cores simultaneously, and the CP/NET server just takes care of I/O automagically! The cores have ID registers they can read, so that you know which core you’re running on, and it kind of gives you an MPI-flavored means of multi-programming. This probably works better in practice than my description would imply – you can be editing a Turbo Pascal program in one window, compile it, and then run it on 8 cores in parallel while you still have your window open (!).
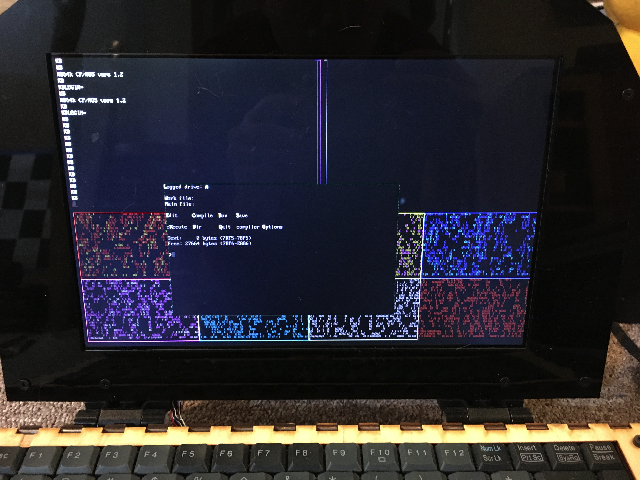
Thanks to multi-sized window supports, my preferred mode of working has now become having all 8 cores of the horde displayed on the bottom half of the screen, with 2 foreground applications in the top half, as can be seen in the Conway’s Game of Life demo GIF above.
What’s Next?
First of all, this whole pandemic things needs to wrap up, so that I can get back to train hacking. Once that’s taken care of, however, there’s still some items on my ZedRipper to-do list.
- Better storage! The SD card module I’m using is flakey, slow, and it’s frustrating to use. I think the FPGA board has some on-board flash memory that could be used, or just improving the performance and reliability of the existing SD card interface. Definitely a weak point at the moment.
- Use that RAM! The big SRAMs that are still unused could definitely support a big shared memory pool for the Z80s, as well as a good frame buffer for playing around with graphics.
- More Z80s? When my initial write-up on the ZedRipper got posted, someone brought a 1980s machine called the ZMOB to my attention (which had a surprisingly similar architecture to the Zed Ripper), which intrigued me. Moving to a cache-based scheme backed by SRAMs would probably let me move to 64-256 Z80 cores, although I haven’t decided if that’s actually an improvement or not. For the record, the ZMOB had 256 * (4 MHz Z80A) = 1 GHZ80, whereas the ZedRipper now has 16 * (140 MHz Z80) = 2.24 GHZ80, so it’s already more than 2x faster than the previous Z80-based champion!
- Better ROM? I’ve been following the very cool RomWBW project, which offers a ton of features that would be nice to have on the ZedRipper.
- Software! Software! Software! This thing already has so much unused capability, it’s just begging for more time to sit down and write software for it.